
Smart Clinic - Data Entry
There are now two methods of data entry in Smart Clinic:
- Patient mode (shown below) i.e. with a patient record open in Consultation manager
- List mode i.e. that does not require a patient record to be open
Treatment Type and Immunisations data can be used in either of these modes
Patient Mode
Patient Mode is what you have been use to over the past 12 years and works with the patient record open in Vision, with a few changes to the screen design, except a little more intelligence now it can read the patient record.
As soon as the immunisation is selected; Smart Clinic would have already ascertained the correct stage, selected the method, claim code (if applicable), preferred site, next due date and reason. Consent given is the default
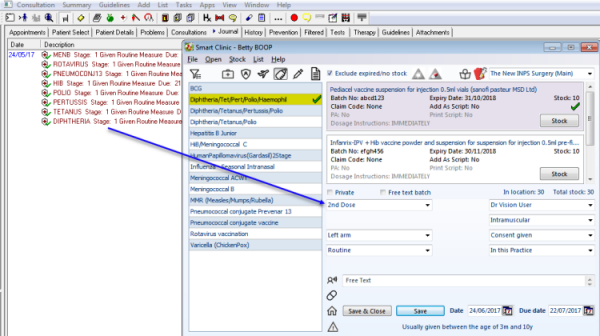
Depending on how you have set up your immunisation batch cards, when saving to Vision; Smart Clinic can automatically add all this data with a single click!
- Immunisation name
- Stage
- Site
- Method
- Reason (Special risk, routine, travel, epidemic)
- Travel includes a vast list of actual countries or a free text option
- Add Manufacturer drug name to immunisation and/or issued drug
- Batch number to immunisation and/or issued drug
- Expiry date to immunisation and/or issued drug
- Enter next due date where applicable
- Additionally issue immunisation as a script
- Set script as personally administered
- Set script to print or not
- Enter specific dosage instruction
- Enter specific free text or ad-hoc free text
- Apply the correct claim code for age and reason
- Record consent given or provided by 3rd party with option to add details of 3rd party
- Reduce from stock count
"Now that's a lot of data in one click, saving a massive amount of time!". Smart Clinic allows you to spend more time with your patients rather than on the computer because everything can be pre-planned!
List Mode
This feature taps into Vision Appointments and Patient Groups allowing you to enter immunisation or treatment type data directly from Vision patient lists. You do not need to have any patient record open in Vision Con Mgr to record any clinical data!
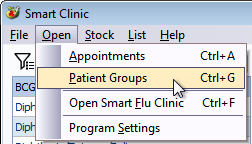
To access either list mode feature click the Open menu
As in patient mode the following features are still available in list mode:
- Alerts for both drug and non-drug allergies are displayed, including any antibacterial medication alerts.
- You can view/print a patients complete immunisation history, listed by their age.
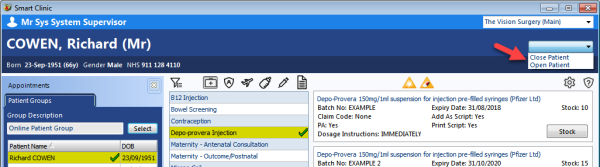
Open Patient Record in Vision
There is also a quick link to open the selected patient record in Consultation manager for the active patient currently showing in Smart Clinic.
Note: All references to names and demographic details shown here are completely fictitious. Any resemblance to real people, living or deceased are purely coincidental.
Patient Search
If there is no patient selected in Smart Clinic or a selected patient is closed in Smart Clinic, the Search Patient option will be displayed as shown below
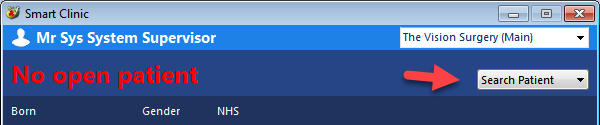
Click Search Patient to use our Smart Search feature
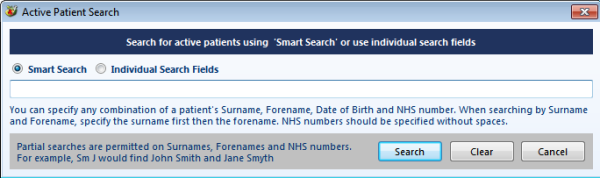
Smart Search is a single field that allows you to type out full or partial information to find a patient match.
Here are some of the methods of typing search criteria:
- Surname Forename DOB
- Surname Forename
- Surname DOB
- DOB
- NHS or H+C or CHI Number depending on Country
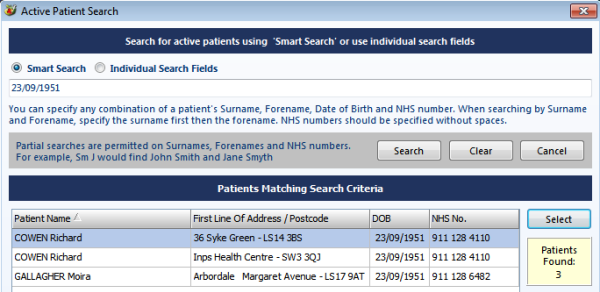
If it finds a unique patient match it will simply select the patient, but if there is more than one match it will list the patient results.
Note: All references to names and demographic details shown here are completely fictitious. Any resemblance to real people, living or deceased are purely coincidental.
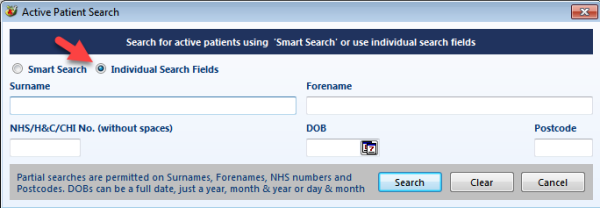
Alternatively, use the Individual Search feature which will display the results from using anyone or more fields
Patient Status
When a patient is selected in List mode the Smart Clinic banner will show demographic information to help ascertain the correct patient.
If the banner background colour is shown in salmon; the selected patient is transferred out

Note: All references to names and demographic details shown here are completely fictitious. Any resemblance to real people, living or deceased are purely coincidental.
If the banner background colour is shown in purple; a different
patient is currently open in Vision Consultation Manager to that selected in
Smart Clinic
.
Note: All references to names and demographic details shown here are completely fictitious. Any resemblance to real people, living or deceased are purely coincidental.
If the
banner background colour is shown in blue; this is the normal colour that
doesn't apply to the two status types mentioned above

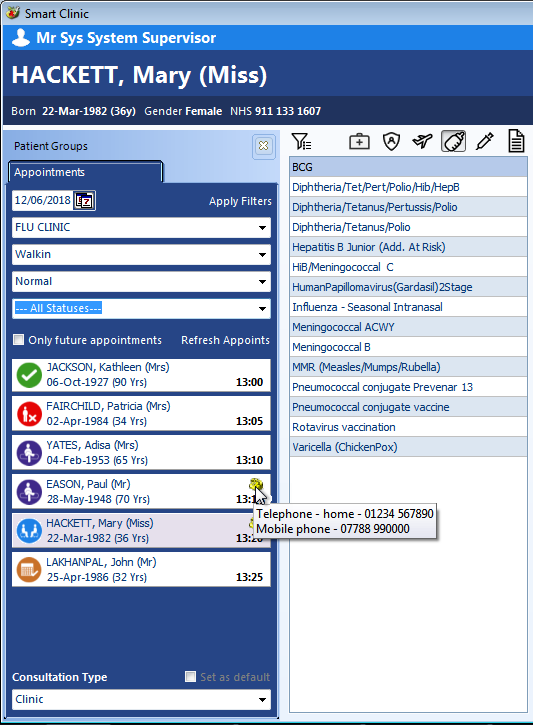
Appointment List
This will allow you to display any session for a book owner and filter the list by specific slot type and appointment status, e.g. so you only see patients that have arrived and are waiting, and not DNA's or those that have not been booked in.
Note: The Vision appointments system is currently going through a change to modernise it and add lots more useful features. This means that we cannot currently develop it to much in Smart Clinic and therefore we are unable to change the appointment status from "Called in" and "Seen". Once the new appointment system has been released, we will revisit this to hopefully include this status update.
Appointment cards will also show contact details when the mouse pointer is hovered over the phone icon as shown in the image below.
Note: All references to names and demographic details shown here are completely fictitious. Any resemblance to real people, living or deceased are purely coincidental.
If any of the appointment drop down list filters are changed, click "Apply Filters" to refresh the data
As the appointments status will need to be updated in Vision Appointments; to retrieve the latest appointment status information in Smart Clinic, click "Refresh Appoints"
- When a patient appointment card is selected it will show the patient name and demographic details in the top banner.
- Smart Clinic will then automatically read the patient record in Vision and make the necessary changes in Smart Clinic with regards to alerts and changes to the immunisation form for recording immunisations or Treatment Type data.
Recording Immunisations in List Mode
Note: The following save process doesn't apply to Treatment Types, which work in exactly the same way as in Patient mode
The Save process works slightly differently in List mode when recording immunisation data only, in that it becomes a 2 step process;
- This allows for multiple immunisations to be stored using the Save option for each immunisation
- When you want to record all the stored immunisations into Vision, click Save & Close
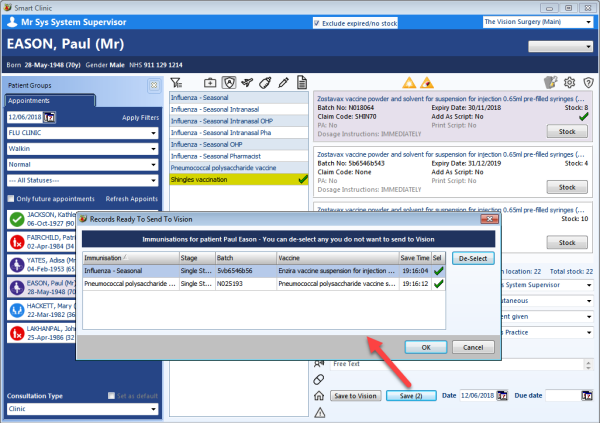
- In the example above Influenza Seasonal and Pneumococcal have been stored, which is reflected in the Save button count. Shingles is now highlighted and also ready to be stored by clicking the Save button again.
- To send all the stored immunisations shown in the Save button count to the patient record, click Save & Close
To view saved immunisation data shown in the Save button count; right mouse click on the Save button to open the "Records Ready to Send to Vision" screen as shown above.
This screen will also allow you to remove any currently stored immunisations, by clicking the De-select button.
If you select another patient while the Save button has a count of recorded immunisations, a screen prompt will be displayed asking what you would like to do with these immunisations.
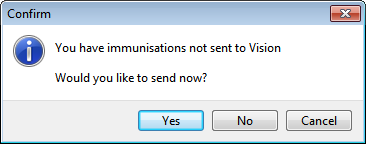
- Select Yes to record the stored immunisations to the patient record in Vision and move to the next selected patient
- Select No to clear all the stored immunisations for that patient and move to the next selected patient
- Select Cancel to stay with the current patient and not move to the next selected patient
Patient Groups
Toggle between Appointments and Patient Groups by clicking the tabs as shown below:

Note: All references to names and demographic details shown here are completely fictitious. Any resemblance to real people, living or deceased are purely coincidental.
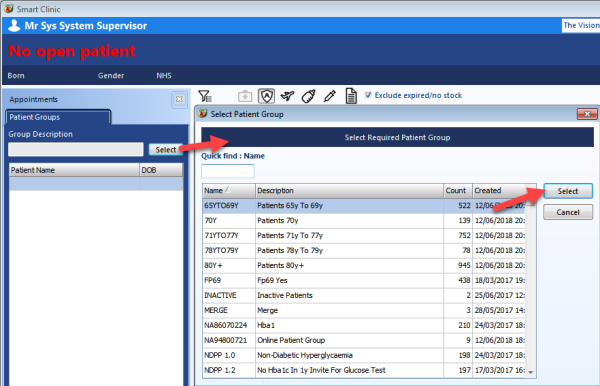
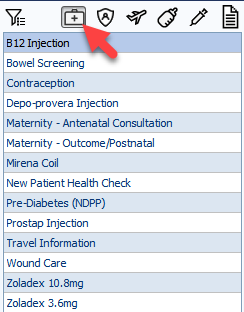
To select a Patient group from Vision
- Click the Select button as shown in the image below. This will then list all the Vision Patient groups.
- Double-click on a listed group to display the patients in Smart Clinic
(or
press the Select button on a highlighted group in the list)
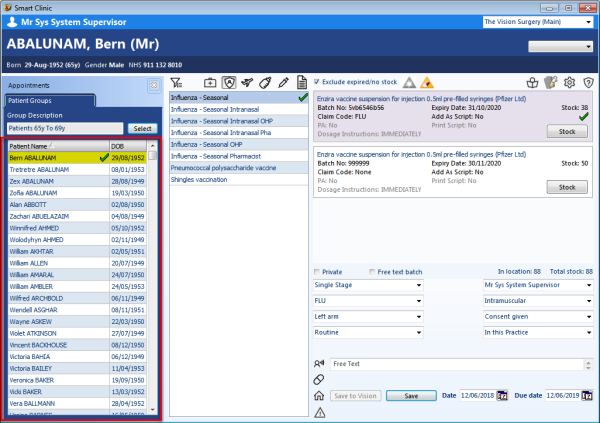
- All the patients in the selected group are now listed in Smart
Clinic as shown below
Note: All references to names and demographic details shown here are completely fictitious. Any resemblance to real people, living or deceased are purely coincidental.
You can select any patient in the Smart Clinic list and record immunisation data in exactly the same way as explained in "Recording Immunisations in List mode" section above.
Note: Patient groups can also be used with Treatment Types
Manually or Bulk enter immunisation data from a patient group
There are two methods of data entry using Vision Patient Groups:
Manual multiple immunisation data entry to Vision 3
This method allows for multiple immunisations to be saved and then transferred to Vision for each patient listed within the Vision patient group. This will also allow for prescriiptions to be generated.
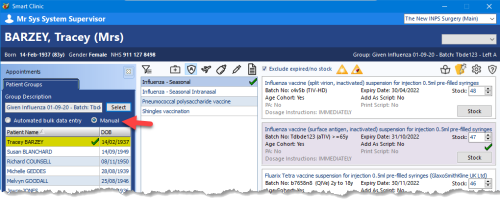
- Click the Select button to choose the Vision 3 Patient Group you want to use in Smart Clinic
- Select "Manual" from the radio button options (which is normally the default option) shown above the group list
- Select a patient within the group list
- Select the vaccine type and relevant batch card (batch number/expiry date)
- Note: That if age range is applied to the batch it will automatically select the most appripriate batch card.
- Check the details on the immunisation form, i.e. stage, body site, etc..
- Click Save to store the immunisation
- Note: A number will appear on the Save (1) button to show how many immunisations have currently been saved in memory for the selected patient
- You may now select another immunisation following the same steps as just mentioned above
- When ready to save all the immunisation data to the patient record - click "Save to Vision"
Automated bulk immunisation data entry to Vision 3
This will automatically cycle through each patient within the Vision patient group and apply a single immunisation to their patient record.
No prescriptions can be generated using this method, and no age rules apply for the selected batch card.
Click here to view a short video tutorial on how to use bulk data entry in Smart Clinic
- Click the Select button to choose the Vision 3 Patient Group you want to use in Smart Clinic
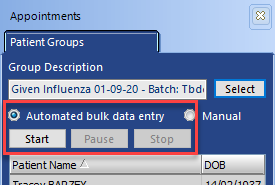
- Select "Automated bulk data entry" from the radio button options, shown above the group list
- Select the vaccine type and relevant batch card (batch number/expiry date)
- Check the details on the immunisation form, i.e. stage, body site, etc..
- Click Start button above the patient group list to initiate the bulk data entry process (shown in above image)
Note: A green checkmark will be assigned to each patient in the list as it successfully records the immunisation data to Vision. A red cross denotes an unsuccessful recording of the immunisation data.
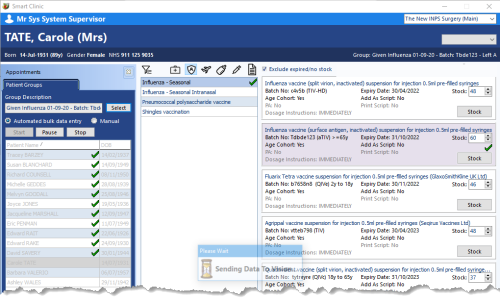
Once the process has completed a summary report will be displayed.

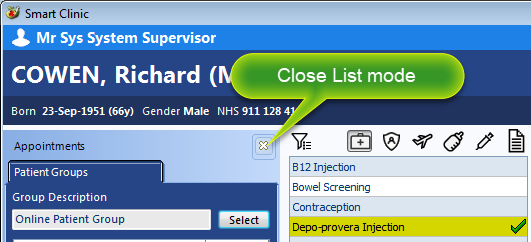
Close List mode
Click the cross to close List mode and return to Patient mode
Note: All references to names and demographic details shown here are completely fictitious. Any resemblance to real people, living or deceased are purely coincidental.
